
...as its the last day of my leave, back at work tomorrow :( I'm really not looking forward to this as I've enjoyed time to myself and gotten rather used to it!!
So in my last few hours of holiday-esqu crafting I serged the edges of my basic block pattern, edited the basic dress pattern (slightly different) to include some extra darts I added right at the end to make it fit better, and started these:
 they're the start of some calico 'models' for basic bag shapes. The idea is I'll have a few 'models' and inside each will be the serged template with the area that becomes the 'front' marked on. This way if I fancy whipping up a bag with a design on the front I know what dimensions to use and it will all work up fairly quickly.
 I've already taken A LOT of photos
- 12x12 square with a 1.5" squared off bottom with 1, 2, 3 + 4 inches turned down, square then trapezoid, then all the same but with a 2.5" square
-10x10 square with 1" and 2" squared bottom with all of the above etc etc
I'll be able to pic the bag I want and have the pattern and front design/embelishment area within seconds. And you will too once I figure the best way to present it :)
And... this evening I got my new rotary cutter out.... and started to cut squares, and started to arrange them, and came up with this:
 I deliberately put the blues in the middle few columns and the darker squares nearer the edges, and I like the faint 'cross' that seems to leap out... am I the only one who sees it?!
 so here they are ready to sew together :) They are all 8.5" so hopefully with .25" seam allowance the whole quilt will measure 80"x72" which should drape over my queen size and if I ever own a king size it'll be perfect for that too!
 Here you can see the little arrows I stitched for lining up!
 ...all the pieces thread basted and overlocked, with the necks and sleeves with no seam allowance. I extended the line between waist and hips by 12 inches with a wide seam alowance also for the skirt.
 Here was the 'experiment' piece for machine stitched ribbon (did NOT look neat enough) and the original bottom wavy edge idea. I planned to overlock a more frequent wave then hand sew the fringed wool on. It looked great but I thought I'd better put it in the washer and dryer to see how it stood up. The result was 'surprisingly well' but there was no longer a 'good side' and the fringed wool didn't sit as straight any more :(
 so...hand attached ribbon edging, machine seams, a side zip, overlocked gentle petal wave bottom edge then hand stitched rolled hem later..... oh, and some fabulous red satin heels ;)


 It ended up being a little bit big around the waist and the arms didn't feel right, so I modified a bit, nipped in here and altered a line there. Cut the next attempt to include a 12 inch A-line skirt and... voila!


 Decide on the finished size of the folded fabric, I've cut these to make 6 inch squares. For 6 inch squares I needed one larger piece, two long pieces 6 inches wide and one 6 inch square.
 This is the layout it should end up like.
 Start by taping down one of the longer pieces to the large (base) piece.
 Measure with the square and line up the second long piece onto the base.
 Take the square piece away
 And tape the second long piece front and back. I'd also tape the top if you have a jaggedy edge to stop fabric catching on it.
 Now measure the square from the top and mark (or hold you finger there :) )
 Place the square where the mark was and tape front and back.
 Thats it finished!! To use it...
  Fold over the edges to line up with the left and bottom
 For larger pieces of fabric you might have to start with a folded piece or fold in from all sides.
 Now using the long edges, fold them over bringing the fabric with it. I tend to place a finger into the fold to help the fabric fold cleanly (I couldn't do this with the camera!).
 Then fold up the bottom flap
 Leaving you with a nicely folded square :)
 Repeat for your entire stash :)
 Here are my 12 inch piles, sorted into upholstery weight, curtain weight, heavy cotton, patchwork weight cotton, and lighter than cotton piles :)
 isn't it beautiful!! Look at some of these fabrics...
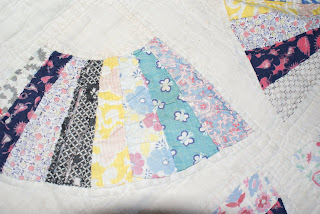 But it is not without damage, apart from the edge needed a whole new bias, some of the fabrics have been completely eaten away. I guess the only way to patch this is with careful applique's :(


