Blimey.
I have just reorganised the smaller 1/3 of my 3-berth craft wardrobe (I reorganised the larger side a few months ago).
I've just redone all my beads into test tubes sand 3 large boxes ended up condensing into 2.
I'm hoping that not having them in small parts storage will mean they don't mix any more. I hope one day I'll be able to suspend my test tubes on a wall with these clip rails
(http://www.ufhtradedirect.co.uk/pipe-fixings-and-insulation/391-self-adhesive-clip-rail-1-metre.html)
But for now... I'm just reorganising it so that S won't go crazy when we move! I've been doing quite a few crafts lately so maybe a round-up soon. Its mainly wedding stuff so don't forget to check out the wedding blog.
Wednesday 3 October 2012
Wednesday 18 July 2012
Other Crafting
I've started to drift into the habit of updating my blogs with several posts in one go. I backdate the posts to the time when I actually did something/ completed something/ made something. I hope this doesn't confuse anyone!
I'd also like to say that as well as this crafts blog I also two other craft related blogs ongoing:
My wedding blog - It details what I'm making/sewing/doing for my handmade wedding. It may have posts that readers of this blog might like to read.
The address is http://thehomemadewedding.blogspot.com
I'm also writing a blog as a 'learning log' in a Textiles course I'm doing with the Open College of the Arts. It contains lots of pictures, musings, sketches, arts stuff and of course sewing.
The address is http://kimstextiles.blogspot.co.uk/
Tuesday 17 July 2012
This is why I collect 'treasure'
I, like many crafters, collect things. Buttons, scraps, beads etc etc. So when my little sister said she was going to buy some sort of belt for the Summer Ball I asked what sort of thing she was thinking and we collaborated to create a belt buckle design for her.
First I sewed a layer of net to both sides of a felt shape using just running stitch and whip stitch. 

Then I sewed on bugle and seed beads (individually was easiest!) And satin stitched the ends with metallic thread.
Then came various buttons to fill in the remaining space
On the back I surrounded corsetry steel with more net and then used that net to sew it to the back. I added two buckles so that it can be put onto a belt.
Et voila! A belt that is inspired by and matches my sisters handbag. Money spent: £0.00.
...She'll probably kill me for putting this in but this is the only picture at the ball that shows the belt! This is past the midnight marker so not so flattering!
Sunday 1 July 2012
My Wedding Present
My handsome fiancé bought me this as his early wedding present to me.
Why is it early? Because I'm going to make out bridal party gifts and our wedding rings using it!
But in the meantime I've been melting glass bottles (they make nice platters).
Wednesday 27 June 2012
Aprons for Linh's Salon
I made 4 plain green aprons with checker neck and waist ties for my friend Linh and her nail salon - www.linhsalons.com
This is the last apron I made - for Linh herself so she gets a sweetheart neckline and black lace frill! I originally had pale green ties but she decided she wanted to match the other aprons more! All the edges are finished with more checks and each has a check edged pocket. I also embroidered 'Linh's Salon' on each using the alphabet function on my sewing machine.
The fabric is a breathable waterproof fabric that is ideal for a nail bar - It'll withstand acetone and can even put up with going through the washing machine!
Saturday 5 May 2012
New video tutorial - Lace Candle Holders
Friday 4 May 2012
Other things I've been doing...
Bad picture I know - but I made this tree centre piece with dry oasis, a hot glue gun and baubles with the tops cut off.
I also re-covered my ironing board with new ironing board underlining
I made these two cushion covers (slight artistic modifications from my youTube upcycled jacket cushion covers video)
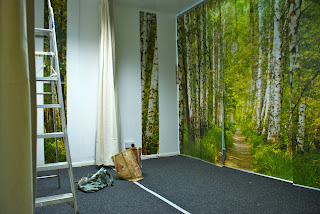
More recently, I also have worked on overhauling the upstairs space in my friends salon. She wanted two cubicles in this area to be able to use for beauty treatments.
Half way through... marking out the cubicle spaces:
After hanging the homemade curtains...
After hanging the photo mural wallpaper (the sections are on curtain panels so they can be slid away)
Psst... I also created a separate blog which has my wedding prep stuff on it... I've been a bit busier over there! No space for any prying fiancé eyes though...!
Wednesday 14 March 2012
Paper apples
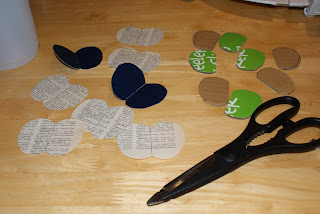
I saw these recycled paper 3d ornaments in a few places so decided to make a few of my own!
Decide on a symetrical motif and bend in half. Cut 8 HALVES from cardboard and 8 WHOLES from recycled decorative papers.
Glue paper to two cardboard halves, repeat until all the cardboard halves are used.
You should now have 4 thick versions and 4 paper versions.
Fold the cardboard covered in paper pieces in half with the paper side inwards and place two together to make up another whole.
Glue a paper section to join the two halves.
COntinue to join the cardboard sections in the same way all the way round, the last one might be quite fiddly but will be easier if the other sections have dried and can be folded out.
Leave to dry thoroughly. Peg or leave under a book if some sections aren't sticking well.
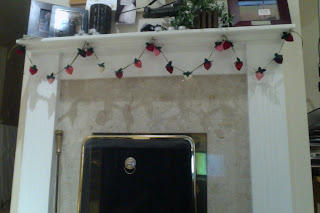
Heres my fireplace with the recycled 3d ornaments - I have apples and a few different styles of tree!
Thursday 5 January 2012
Strawberries
Lovely Fabric Strawberries
Heres the (real time) video:
(I'm going to do a sped up version too, link will be in the intro)
And link to a quick guide pdf:
Subscribe to:
Posts (Atom)


